Smart Robotic Automatic Vacuum Cleaner
Introduction
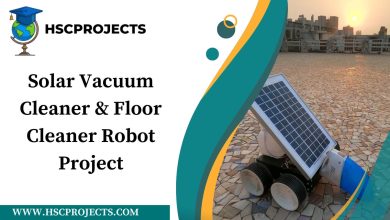
The automatic vacuum cleaner robot project aims to revolutionize the way we think about household cleaning. Gone are the days when you needed to manually vacuum your home. This project outlines how to build an automatic cleaning robot that not only vacuums your floor but also does so in an optimized manner, covering every nook and cranny of your room.

How It Works
The robot follows a zigzag path to ensure it covers the entire room. It uses ultrasonic sensors to detect the boundaries of the room and navigates accordingly. The vacuum cleaner is attached to the back of the robot, which sucks up the dust as the robot moves. The time taken for the entire cleaning session is displayed on an LCD screen, providing a comprehensive report of the cleaning process.
Hardware Specifications
- Microcontroller
- Ultrasonic Sensors
- Vacuum Suction Motor
- LCD Display
- Wheels and Motors
- Battery
- Frame and Casing
Software Specifications
- Development Environment: Atollic Studio
- Programming Language: C
Circuit and Block Diagram
The vacuum cleaner circuit diagram and block diagram of vacuum cleaner components are essential for understanding the internal workings of this automatic cleaner. These diagrams provide a detailed view of how the microcontroller, sensors, and motors are interconnected.
Future Improvements
While the current system requires an obstacle-free room for optimal performance, future iterations could include obstacle detection and navigation. This would make the automatic vacuum cleaner robot even more versatile and user-friendly.
Conclusion
The automatic vacuum cleaner robot project offers a glimpse into the future of home cleaning. Its smart robotic features, combined with efficient cleaning mechanisms, make it a must-have for any modern household.
Sample Code
#include <LiquidCrystal.h>

// Initialize the LCD
LiquidCrystal lcd(12, 11, 5, 4, 3, 2);

// Define pins for motors and vacuum cleaner
const int leftMotor = 7;
const int rightMotor = 8;
const int vacuumMotor = 9;

// Define pins for ultrasonic sensor
const int trigPin = 10;
const int echoPin = 11;

// Variables
long duration;
int distance;
unsigned long startTime;
unsigned long endTime;

void setup() {
  pinMode(leftMotor, OUTPUT);
  pinMode(rightMotor, OUTPUT);
  pinMode(vacuumMotor, OUTPUT);
  pinMode(trigPin, OUTPUT);
  pinMode(echoPin, INPUT);
  lcd.begin(16, 2);
  lcd.print("Cleaning Time:");
  startTime = millis();
}

void loop() {
  // Turn ON vacuum cleaner
  digitalWrite(vacuumMotor, HIGH);

  // Check for boundary
  digitalWrite(trigPin, LOW);
  delayMicroseconds(2);
  digitalWrite(trigPin, HIGH);
  delayMicroseconds(10);
  digitalWrite(trigPin, LOW);
  duration = pulseIn(echoPin, HIGH);
  distance = duration * 0.0344 / 2;

  // Move robot
  if (distance >= 20) {  // Move forward if no boundary detected
    digitalWrite(leftMotor, HIGH);
    digitalWrite(rightMotor, HIGH);
  } else {  // Turn right if boundary detected
    digitalWrite(leftMotor, LOW);
    digitalWrite(rightMotor, HIGH);
    delay(500);  // Adjust the delay as per your requirement
  }

  // Display cleaning time
  endTime = millis();
  unsigned long cleaningTime = (endTime - startTime) / 1000;
  lcd.setCursor(0, 1);
  lcd.print(cleaningTime);
  lcd.print(" sec     ");  // Extra spaces to clear previous characters
}
In order to download the PDF, You must follow on Youtube. Once done, Click on Submit
Subscribed? Click on Confirm
Download Smart Robotic Automatic Vacuum Cleaner PDF